This easy homemade New York-Style Bagel recipe is simply the best! Basic pantry ingredients transform into deliciously chewy freshly made New York bagels.
This is simply the best homemade New York-Style Bagel Recipe. After so much love (this recipe has received over 11 years worth on here!), I had to share the recipe in Hand Made Baking, and I updated this page with various photos, tons of tips, tricks, and information you’ll need to achieve the most perfect chewy homemade bagels.
This easy bagel recipe is delicious and results in perfection. It does not need as much dedication as other bagel recipes you will find on the web– you do not need to dedicate 2 days to this. It’s a same-day homemade bagel recipe that comes together in 2 hours.
As a native New Yorker, I know there’s nothing better than a fresh bagel schmeared with cream cheese. I have a high standard when it comes to bagels and I don’t put unusual ingredients in mine.
In these bagels, you will not find any yogurt, maple-syrup, or ingredients you might not have in your pantry.
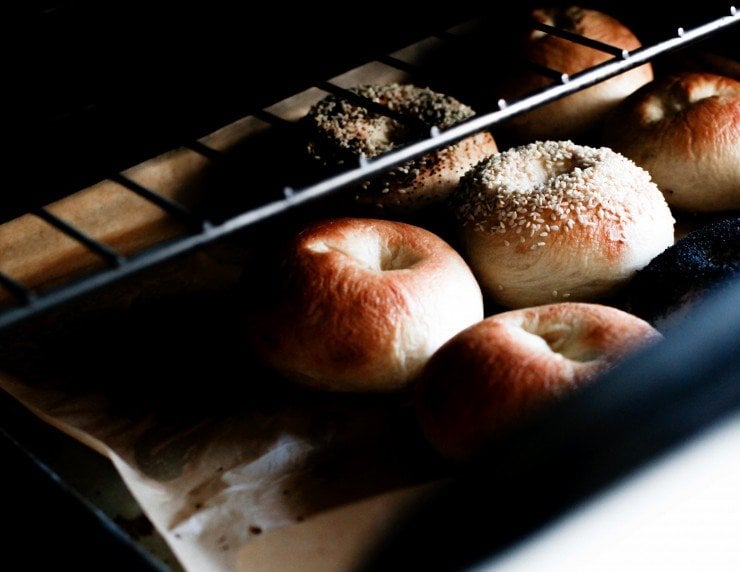
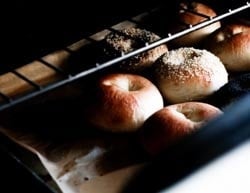
I no longer live in New York City, and I constantly crave the good old-fashioned bagels I grew up on– flavorful, modestly sweet, and chewy with soft, shiny crusts. These bagels are made the classic way: you boil them in water for a couple of minutes before you bake them. This is probably one of the most bizarre things a person can do to dough, but it just works.
This bagel recipe is a very altered adaptation of one from a cookbook, Ultimate Bread, that I borrowed over a decade ago from my aunt. It was my first introduction to homemade bagels. Over the years, this has become the best bagel recipe that I’ve ever made.
It doesn’t require unusual ingredients or require special equipment to make the recipe. These homemade chewy bagels are a treat fresh out of the oven, but when they’re toasted– oh, my! Can we just say that you’ll be making this bagel recipe time and time again?
After making this New York-Style bagel recipe on your own, you will feel a sense of accomplishment and satisfaction. I know I always do! This will definitely give some competition to your local bagel shop- the recipe is that good (I mean, look at the comments!).
This homemade bagel recipe is so good that you’ll be impressed with yourself and totally satisfied after you take a nice bite out of one of these freshly made chewy bagels. So, if you mail order bagels from your favorite spot in New York City and pay $7.50 a bagel, save your money!
And if good bagels cannot be found where you live, worry no more; this recipe is infinitely adaptable, and the little bit of effort you put into making these bagels is well worth it. It’s time to get baking!
Homemade Bagel Recipe Ingredients
This homemade bagel recipe consists of four major parts– making and preparing the bagel dough, shaping and boiling the bagels, the bagel topping, and the things you’ll need to serve them with. Here’s what you’ll need:
The Bagel Dough: The Bagel Recipe Ingredients
• Granulated Sugar– this is used to slightly sweeten the bagel dough and to activate the yeast.
Feel free to use natural cane sugar here if you have it.
• Active dry yeast– to help the bagel dough form and rise.
• Luke warm water– this needs to be between around 105ºF/ 40.5ºC and 115ºF / 46ºC; this will also help the yeast activate and bind the flour and other ingredients into a smooth, elastic bagel dough. On the rare occasion, you may need more water than listed in the recipe. The water called for in the recipe is a guide– your ultimate goal is to form a smooth bagel dough that is moist and firm.
• Bread flour – It contains a high protein content, perfect for making homemade bagels that are chewy. All-purpose flour works here too, they will be just as delicious– just not as chewy as ones made with bread flour (Read: New York-Style Bagel Recipe FAQ located below the recipe in this post for more information about flour alternatives for these homemade bagels).
• Fine-Grain Sea Salt– this adds the right amount of flavor to the bagels.
Shaping and Boiling the Bagels
There are many methods in which you can shape a bagel; there is a more traditional method that many bagel shops use– you roll the bagel dough into logs and bind the ends together.
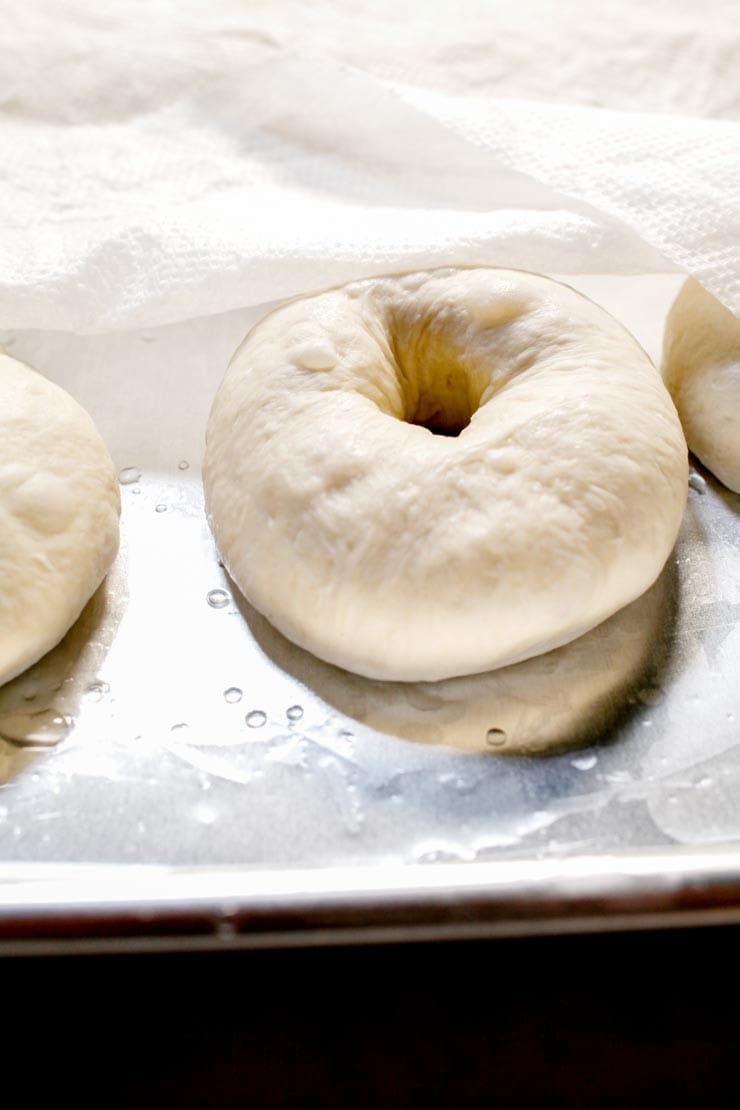
The method used here is done by simply poking the hole in the middle of taught rounds of bagel dough. Once that is done, the bagel rings are gently stretched to about a third of the diameter of the bagel.
After a short rest, each bagel is boiled. This gives the bagels their New York-Style signature delicious, chewy, and shiny crust.
Read more: New York-Style Bagel Recipe FAQ located below the recipe section in this post.
While you can opt to flavor your poaching liquid (there’s more information about this in the FAQ section), I keep it simple here and just use water and these come out perfect every time.
The Bagel Toppings
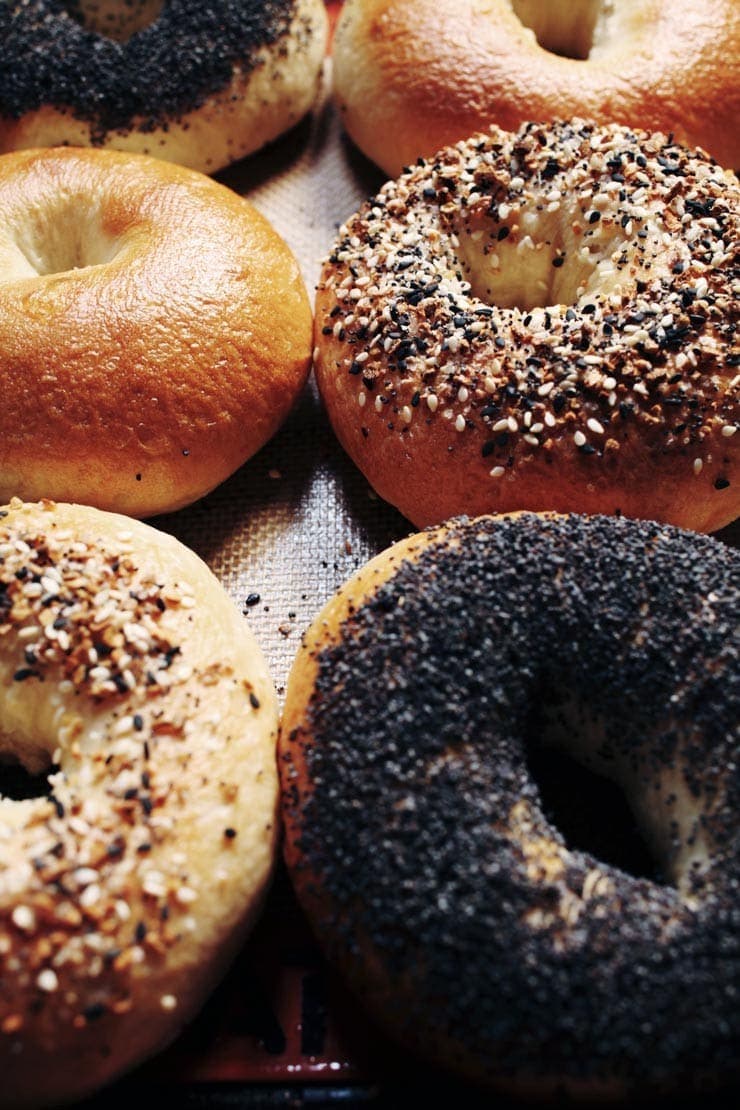
Favorite bagel toppings vary from person to person. Depending on the day, I like a good homemade everything bagel or a poppyseed bagel. I know many people who are partial to single toppings like minced onion or coarse salt. Whatever you like, definitely customize the toppings to match your tastes.
Everything bagel seasoning, minced fresh garlic, minced fresh onion or shallot, poppy seeds, sesame seeds, caraway seeds, coarse salt, cinnamon sugar- these are just some of the many topping options you can go with to customize the taste of your bagels.
What to Serve the Bagels With
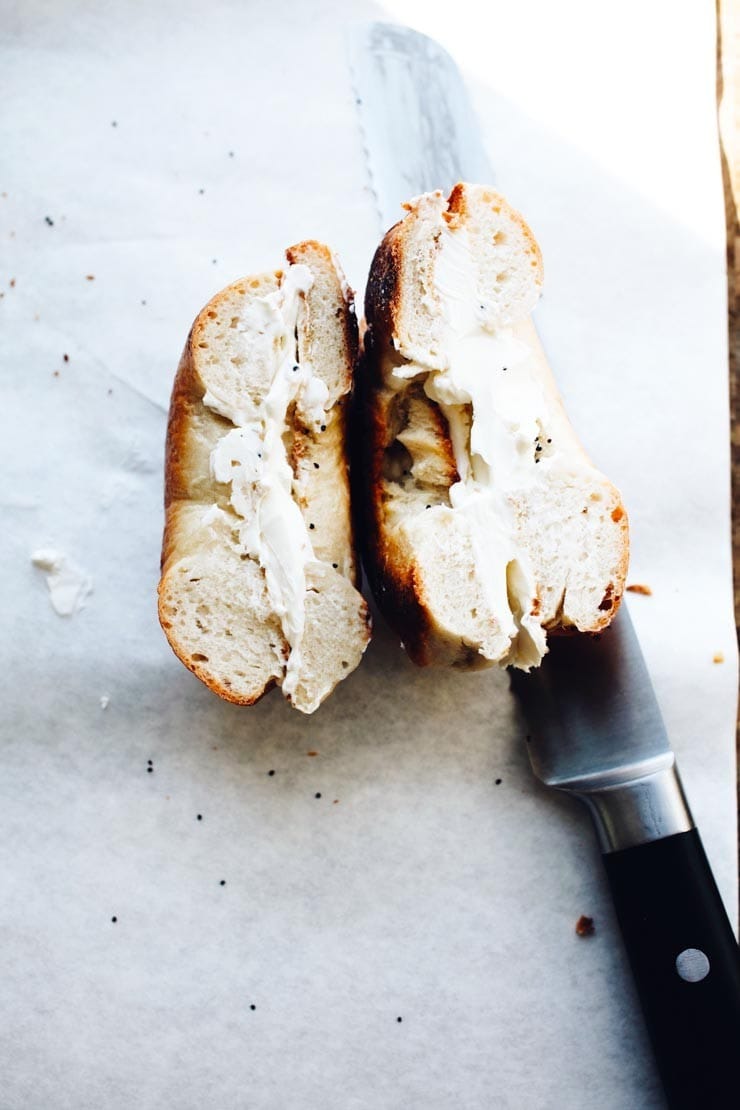
A proper New York-Style bagel always requires a schmear. What is a “schmear” you ask? It’s a generous slather of cream cheese. It’s practically a requirement, especially when these homemade bagels come out of the oven. However, there are multiple ways you can serve them– all of which I have listed within this post.
How to Make Homemade New York-Style Bagels
First, proof the yeast. Proofing basically means you’re activating the yeast. To do this, you will need to add sugar and yeast into luke warm water. After about 5 minutes, the yeast will bubble up; this indicates that the mixture is ready to stir until everything is properly dissolved.
Then, mix the bagel dough together. You can you can opt to make the bagel dough by hand (which I highly recommend if you’re making this recipe for the firs time), or you can do so with a stand mixer fitted with the hook attachment, on the lowest setting (for about 5 to 6 minutes). If you’re making a double batch you might not be able to use your stand mixer for kneading– refer to your manufacturer’s instructions.
When mixing the bagel dough, you may or may not need the entirety of the water called for in the recipe. You want the bagel dough to be moist and firm after it is mixed. Sometimes you may need more water, depending on humidity, brand of flour, your altitude, climate, amongst many other things.
Once the dough has come together and has been kneaded, place the bagel dough in an oiled bowl to rest for an hour (about 2 hours if you’re using less yeast) or covered overnight in the refrigerator.
Once the bagel dough has rested, you will need to deflate it. You will know it has rested enough when you poke the dough with your finger and the impression remains. If it bounces back, the bagel dough has not risen enough.
If you allowed the bagel dough to rest in the refrigerator, allow it to sit at room temperature for about 1/2 hour before working with it.
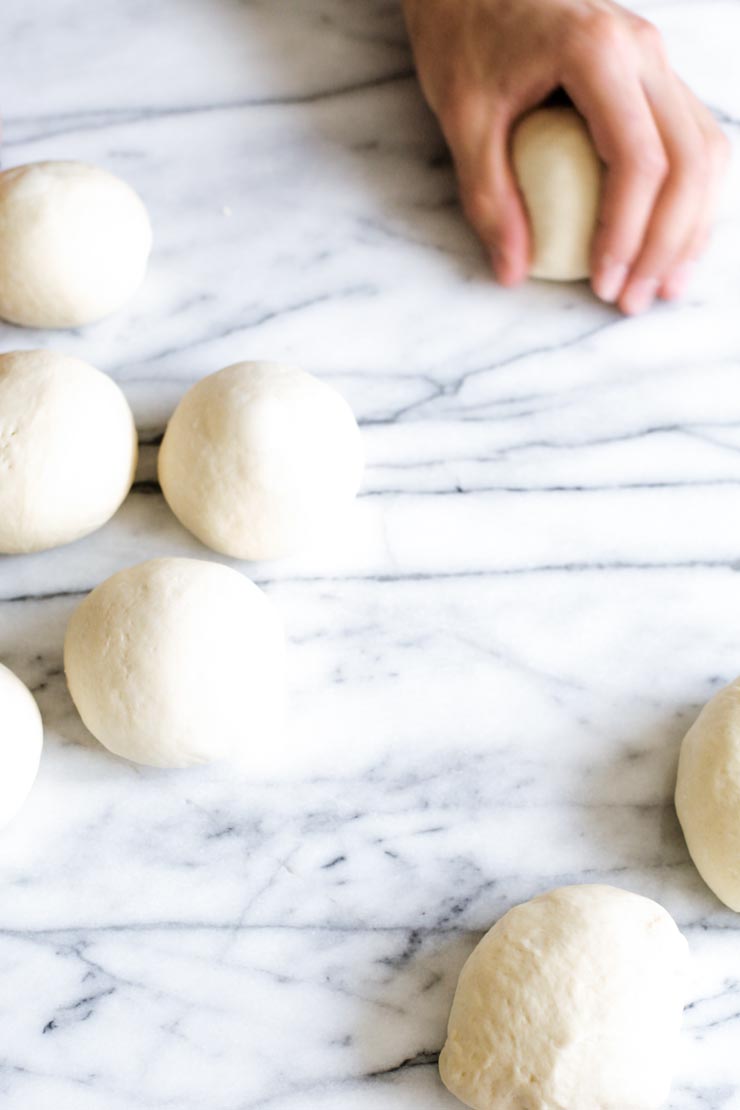
Once deflated, divide the dough. It should be divided into 8 equal portions. Feel free to use a scale or eyeball it. You do not have to be exacting about this; just make sure they’re roughly even so that all the bagels bake at the same time.
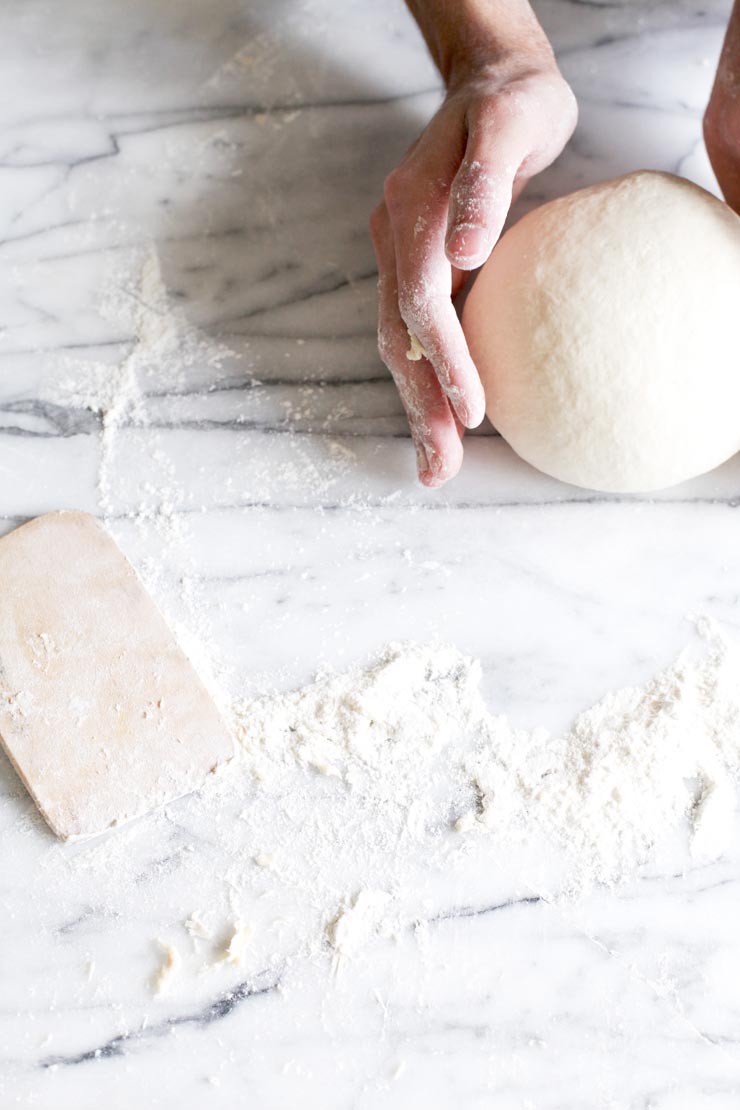
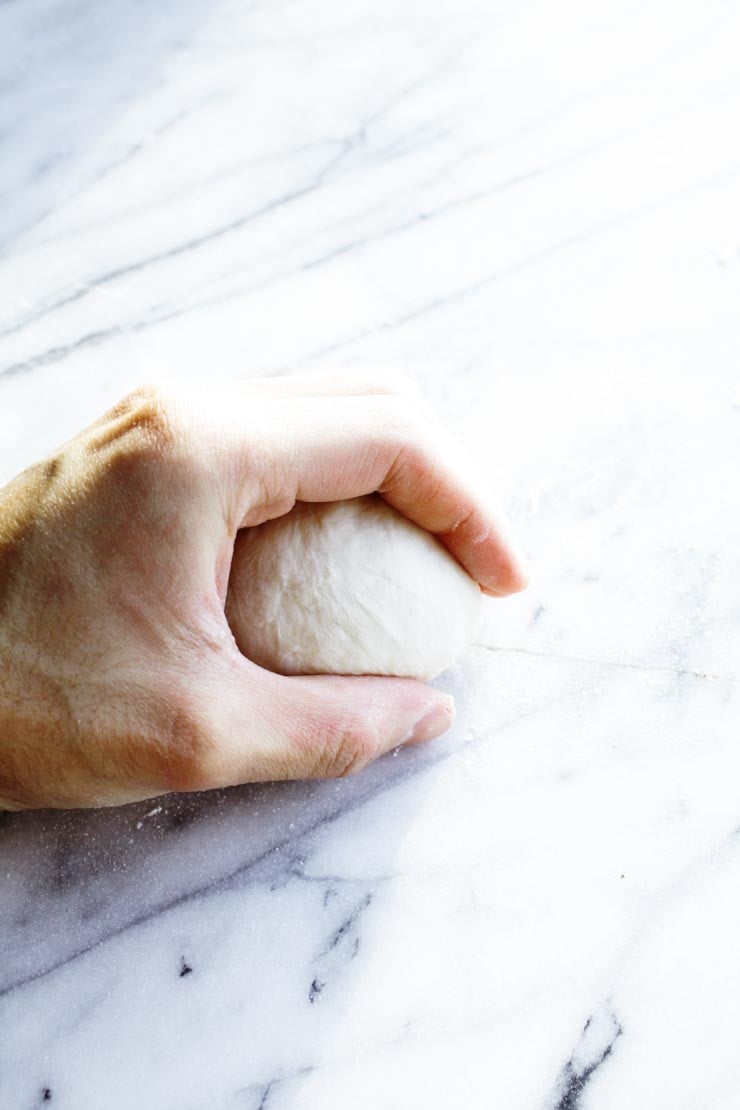
After that, form the bagel dough portions into rounds. Don’t use flour for this step. This is going to sound more complicated than it is, but hold your hand in a C shape while cupping a portion of dough.
Press the dough against the work surface (remember to avoid flouring it) and move your hand and the dough in a slow, circular motion. Allow the irregular edge of the dough to pull onto itself, while decreasing the pressure on top of the dough slightly until a perfectly smooth round ball forms.
Repeat this with the other portions. Have your eyes crossed? This probably does sound difficult at first, but essentially all you’re doing is making the dough round taut by pulling its sides in and keeping it round.
Now, here comes the part when we shape the bagel dough! Working gently and firmly with the dough will result in perfectly smooth bagels.
Simply coat a finger with flour and gently press your finger into the center of each dough ball. Then you stretch the rings out to about a third of the diameter of the bagel and place them onto a prepared baking sheet.

It’s time to boil the bagels. The bagels need a little rest in between shaping and boiling. So, while the unbaked bagels rest, bring a large pot of water to a bubbling boil.
Once it has reached a boil, lower the heat to a simmer. You’ll need a slotted spoon or a skimmer to place the bagels into the water. Some folks like to use small squares of parchment that they cut up before hand– do what is most comfortable for you.
Handling the uncooked dough with the utmost care will preserve their shape as well.
Boil the bagels and don’t overcrowd the water. Boil as many bagels as you can comfortably fit into the pot. They will puff up quite a bit, so do keep in mind they do need some breathing room.
Once in the water, the bagels will float on the top. Let them sit for 1 minute, then gently flip them over to boil for another minute on the other side.
This will give them a nice crust and their signature New York-Style chew. You can go a little bit longer on the poach, as well. This will give them a stronger crust and chew– more on that in the recipe.
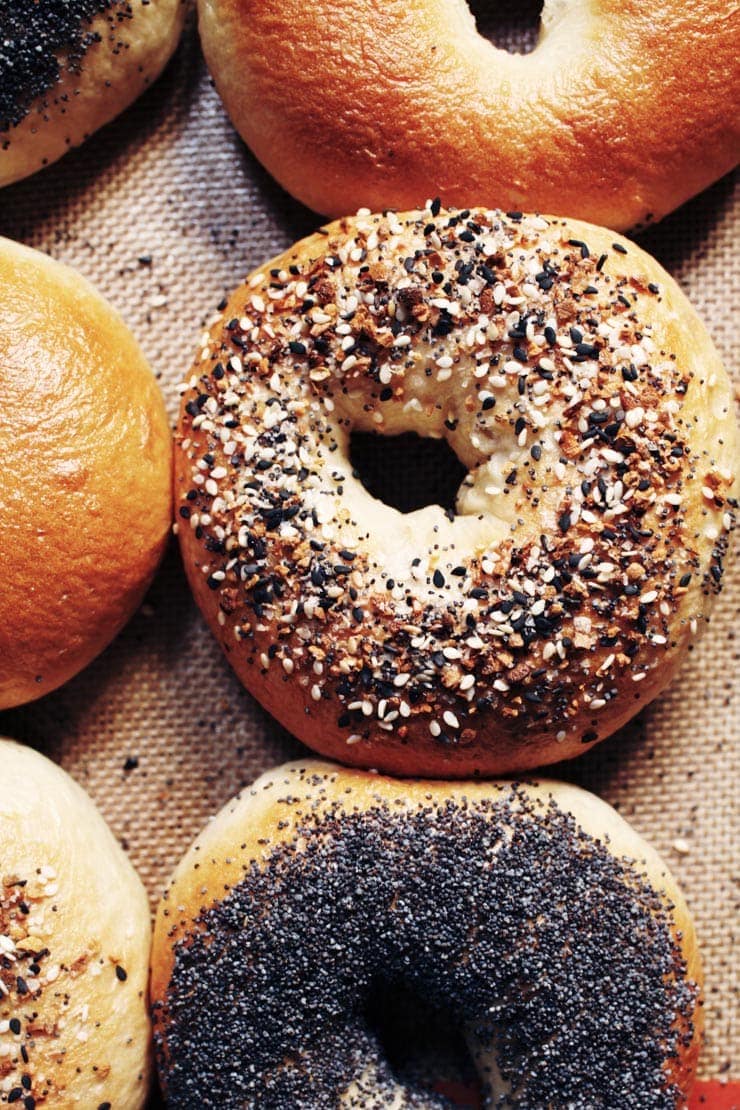
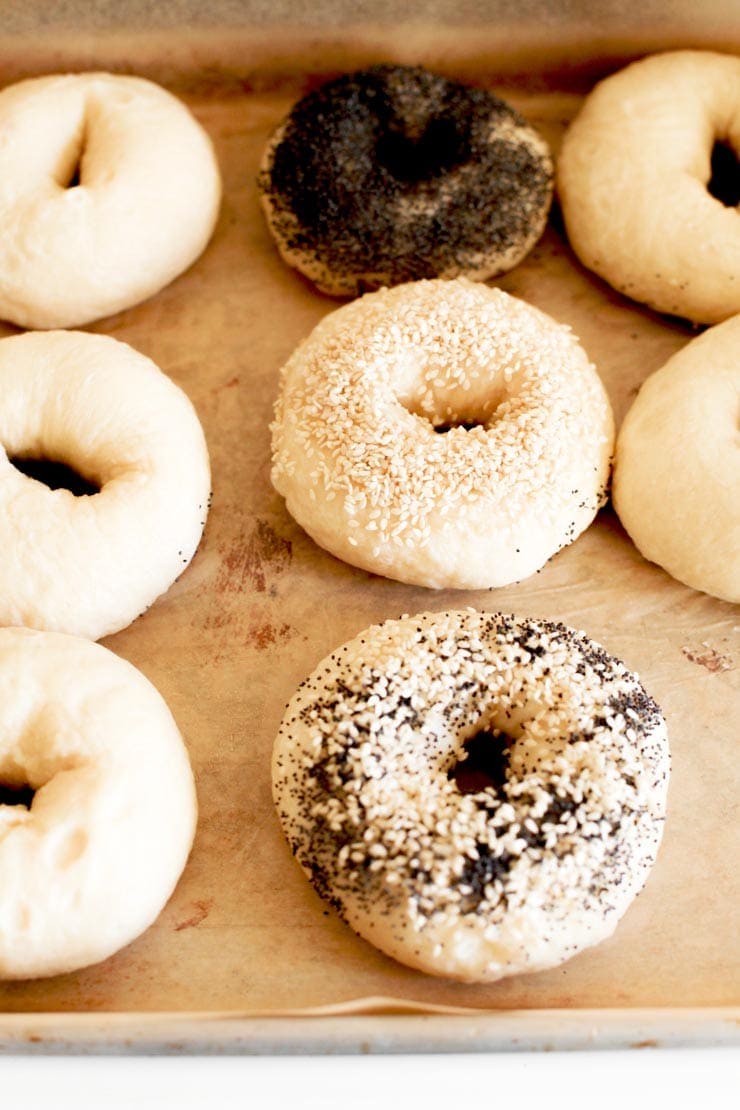
After boiling them, top the bagels! This is the time when you can let your creativity run free. You can use any or all of the topping options listed in the recipe.
Often times I do a combination of toppings to make a delicious homemade everything bagel or I sometimes just keep it plain or stick to one ingredient on each bagel. Be creative!
Once the bagels have been topped, bake them. Depending if your oven is calibrated or not (I like to keep an oven thermometer in mine to ensure it’s always accurate), you will need to bake the bagels between 20-25 minutes. Until they’re uniformly golden brown.
Now, here is the difficult part (not really). You’re supposed to let these cool for at least a few minutes once they’re out of the oven, until you can handle them. If you’re impatient like me, I brave through it, slice one open and schmear some cream cheese on mine right away.
Take a bite… Oooh, child!
Homemade New York-Style Bagel Serving Suggestions
There is no right or wrong way to eat a bagel, but I’ve listed a few ideas and classic options you would enjoy. A schmear is a classic.
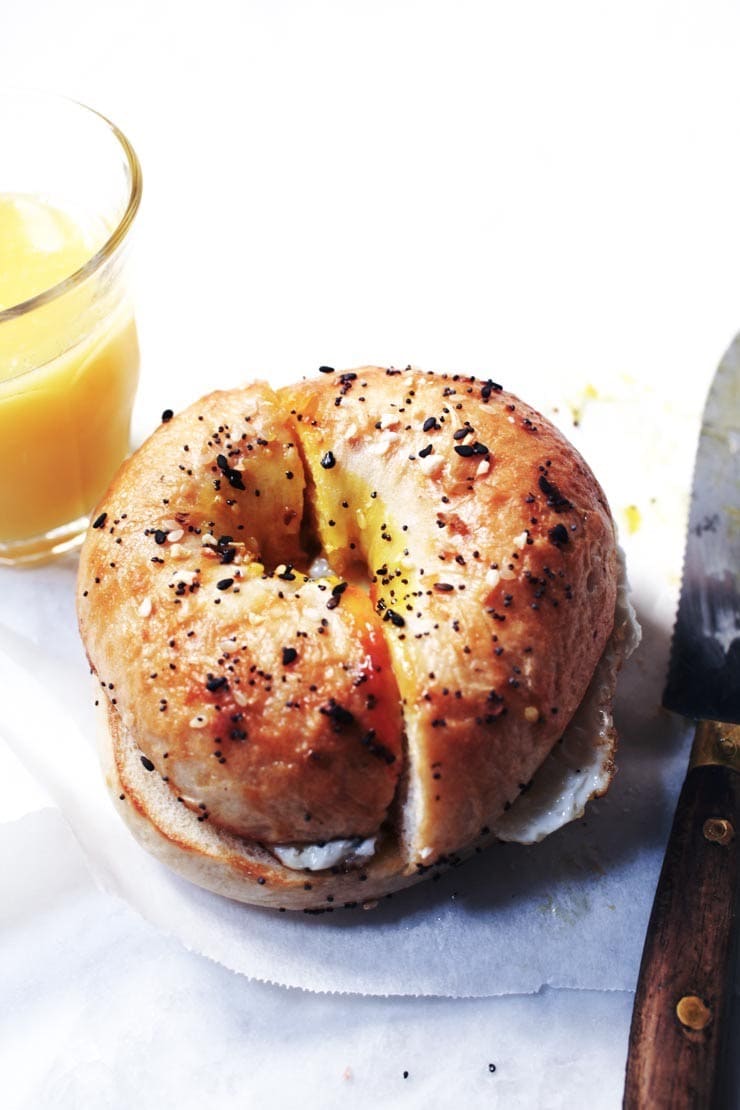
A bagel with lox is also another classic. If you’re looking for a good breakfast idea, go the New York City deli route and make yourself an Egg and Cheese Bagel (bacon is preferred, but optional).
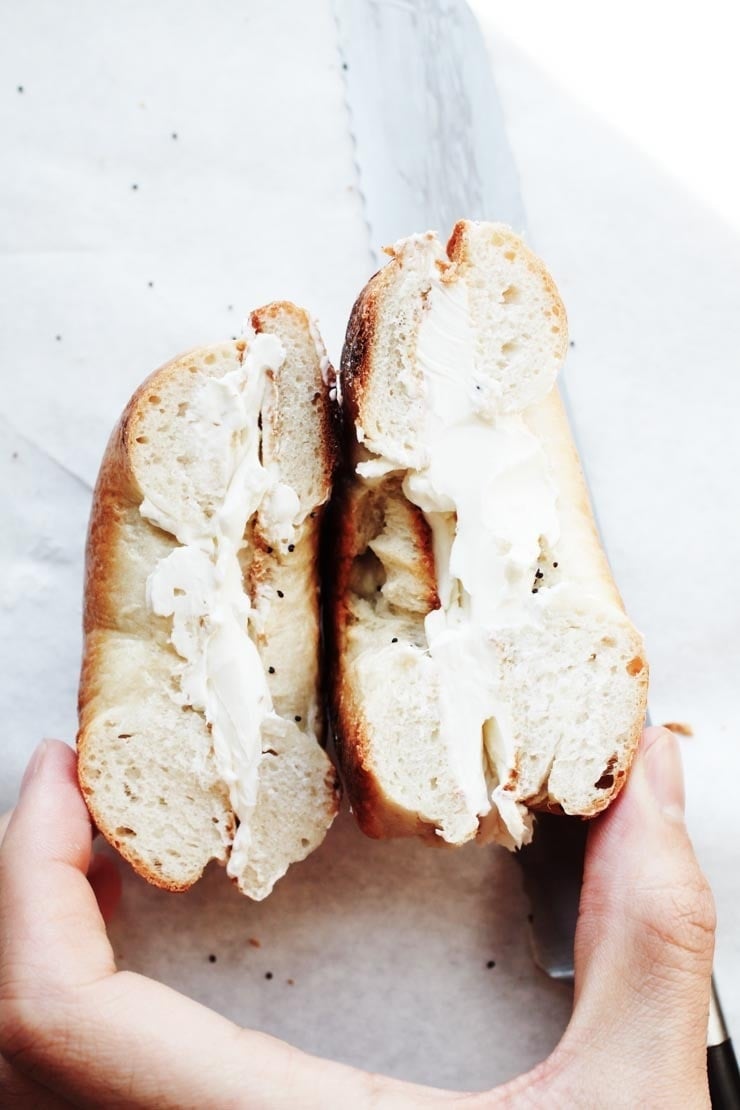
• Bagel with cream cheese– either plain, or your choice of flavored cream cheese. A schmear is a New York classic, and it’s so good.
• Bagel with butter– especially with homemade butter or a delicious French butter. Heavenly.
• Bagel with butter and jam– more specifically homemade butter and homemade strawberry jam– a match made in heaven. Highly recommended!
• Bagel with lox– add a schmear of cream cheese, lox on top, a slice of fresh tomato, red onion, thinly sliced cucumbers, and some deliciously briney capers. Perfection.
• Bagel with Avocado– a nice, healthy option. Toast the bagel, smash a ripe avocado on top, season to your liking, and serve it. Bacon is perfect on top, if you’re into that. Leftover guacamole is also delicious.
• Bagel with Egg and Cheese– this is New York City deli / bodega-style, peeps. Toast the bagel. Butter it lightly. Make an egg and cheese omelet to your liking. Or fry an egg up, over easy, season it with salt and pepper, top it with cheese and bacon. Add ketchup, if you’re into it; add aioli, hot sauce, sriracha, sambal olek, or a combination thereof if you’d prefer that. Cut it in half. You’ll thank me later.
More Everyday Baking Recipes
- New York-Style Soft Pretzels
- Cinnamon Sugar Soft Pretzels
- Perfect Chocolate Cupcakes
- The Best Raspberry and Cream Scones
- Incredible Profiteroles
- Strawberry Pavlova
New York-Style Bagel Recipe
As a native New Yorker, I know there's nothing better than a fresh bagel schmeared with cream cheese. I no longer live in New York City, and I constantly crave the good old-fashioned bagels I grew up on– flavorful, modestly sweet, chewy ones with soft, shiny crusts.
These bagels are made the classic way: You boil them in water for a couple of minutes before you bake them. This is probably one of the most bizarre things a person can do to the dough, but it works. So, if good bagels cannot be found where you live, worry no more; this recipe is infinitely adaptable, and the little bit of effort you put into making these bagels is well worth it.
Ingredients
- 2 teaspoons / 6 g active dry yeast
- 4 ½ teaspoons / 19 g granulated sugar
- 1 ¼ cups / 300 ml warm water (you may need ± ¼ cup /60 ml more)
- 3 ½ cups / 440 g bread flour or high gluten flour (you may need up to 1/2 cup / 60g for kneading)
- 1 ½ teaspoons / 6 g salt
- Optional Toppings: (Refer to Notes)
Instructions
- In ½ cup /120ml of the warm water, pour in the sugar and yeast. Do not stir. Let it sit for five minutes, and then stir the yeast and sugar mixture until it all dissolves in the water.
- Mix the flour and salt in a large bowl. Make a well in the middle and pour in the yeast and sugar mixture.
- Pour 1/3 cup / 80ml of warm water into the well. Mix and stir in the rest of the water (the scant 1/2 cup / 100ml that is remaining), as needed. Depending on where you live, you may need to add an additional couple tablespoons to about ¼ cup/60ml of water. You want a moist and firm dough after you have mixed it.
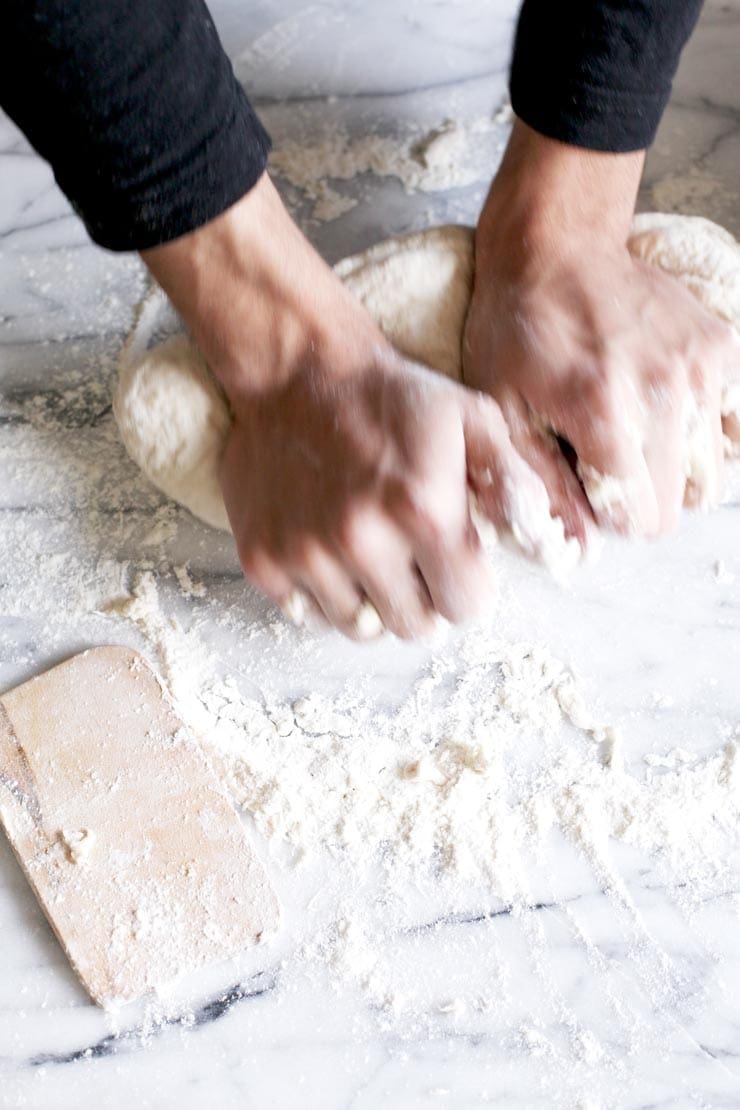
- On a floured countertop, knead the dough for about 10 minutes until it is smooth and elastic. Try working in as much flour as possible to form a firm and stiff dough.
- Lightly brush a large bowl with oil and turn the dough to coat. Cover the bowl with a damp dish towel. Let rise in a warm place for 1 hour, until the dough has doubled in size. Punch the dough down, and let it rest for another 10 minutes.
- Carefully divide the dough into 8 pieces (I used a scale to be extra precise, but it’s not necessary). Shape each piece into a round. Now, take a dough ball, and press it gently against the countertop (or whatever work surface you’re using) moving your hand and the ball in a circular motion pulling the dough into itself while reducing the pressure on top of the dough slightly until a perfect dough ball forms (as pictured). Repeat with 7 other dough rounds.
- Coat a finger in flour, and gently press your finger into the center of each dough ball to form a ring. Stretch the ring to about ⅓ the diameter of the bagel and place on a lightly oiled cookie sheet. Repeat the same step with the remaining dough.
- After shaping the bagels and placing them on the cookie sheet, cover with a damp kitchen towel and allow to rest for 10 minutes. Meanwhile, preheat your oven to 425ºF / 220ºC / Gas Mark 7.
- Bring a large pot of water to a boil. Reduce the heat. Use a slotted spoon or skimmer to lower the bagels into the water. Boil as many as you are comfortable with boiling. Once the bagels are in, it shouldn’t take too long for them to float to the top (a couple seconds). Let them sit there for 1 minute, and then flip them over to boil for another minute. Extend the boiling times to 2 minutes each, if you’d prefer a chewier bagel (results will give you a more New York-Style bagel with this option).
- If you want to add toppings to your bagels, do so as you take them out of the water. Alternatively, you can use an egg wash to get the toppings to stick before baking the bagels. You may want to use the “Optional Toppings” listed above to top the bagels. Use just one topping, or a combination to make your own Everything Bagel Seasoning.
- Once all the bagels have boiled (and have been topped with your choice of toppings), transfer them to an oiled or parchment-lined baking sheet.
- Bake for 20 - 25 minutes, or until golden brown (I usually err on the side of 20 minutes).
- Cool on a wire rack (Or, if you’re impatient like I am, slice one of these babies open and spread on some of your favorite cream cheese or softened butter. Take a bite… Oh babyyy!)
Notes
Optional Toppings:
Caraway seeds, cinnamon sugar, coarse salt, minced fresh garlic, minced fresh onion, poppy seeds, sesame seeds, everything bagel seasoning, or a mix of your favorite flavors.
Water measurement & similar concerns:
The recipe measurements for the water in the recipe is a guide; not all 1 1/4 cups (300 ml) will be used unless you need it. This is because of environmental factors (humidity, temperature, altitude, etc.) and the flour you are using. The most important thing when making the dough is to make sure it is homogenous and smooth– do not get caught up on the water measurement. If the dough is too firm, add in more water to ensure the dough is not dry and flaky– this has to be done when mixing the dough, not after you’ve allowed it to rise.
For all other concerns, please review past comments and refer to the FAQ below the recipe card for this recipe.
Nutrition Information:
Yield:
8 Medium-Sized BagelsServing Size:
1 BagelAmount Per Serving: Calories: 228.4Trans Fat: 1.4gCholesterol: 0mgSodium: 441mgCarbohydrates: 44.4gFiber: 1.7gSugar: 2.4gProtein: 6g
New York-Style Bagel Recipe: Frequently Asked Questions (FAQs)
The following is a comprehensive list of Frequently Asked Questions I receive about this New York-Style Bagel Recipe. You will find answers to your questions about Yeast, types of flour you can use, and everything you may need to keep in mind when it comes to preparing this homemade bagel recipe and storing the bagels properly.
The Yeast
• Can I use fresh yeast?
If you are unable to get active dry or instant yeast, you can use fresh yeast. The general rule of thumb is a ratio of 2.5:1, fresh to active dry. As the amount of active dry yeast used in the recipe is only 6 grams, you would need about 15 grams of fresh yeast.
When substituting fresh yeast, you may want to make a few adjustments to the method; fresh yeast does not need to be proofed like active dry yeast (the water, sugar, and yeast step will be unnecessary in this case), so do keep that in mind. But, as some have told me, they’ve simply substituted fresh yeast for the active dry yeast and followed the steps as directed without any issues.
• Can I use instant yeast for this bagels recipe?
You can. Substitute an equal amount. There’s no need to proof the yeast, so add the yeast to the flour with the sugar and jump straight to making the dough.
• I prefer less of a yeasty bread-like flavor, how can I achieve that?
You can reduce the amount of active dry yeast to 1 teaspoon in the recipe; do note that you will have to double the rising time to about 2 hours, instead.
Types of Flour
• What if I can’t find bread flour? Can I substitute regular (all-purpose) flour?
If you don’t have access to bread flour, it is okay to use all-purpose flour; they will still come out wonderfully. Alternatively, if you can find vital wheat gluten (it’s usually carried at health food stores), add 4 teaspoons to the all-purpose flour, and you should have a good substitute for the bread flour called for in the recipe.
• Can I make bagels with whole-wheat flour?
Yes, simply use half whole-wheat flour and half bread flour. If you like a milder tasting bagel, you can use white whole-wheat flour.
• Can I use spelt flour for bagels?
Yes. Use 2 cups / 255 g whole-wheat flour and 2 1/2 cups / 315 g sifted spelt four. Alternatively, readers have told me that they’ve made the bagels entirely out of spelt flour with great success.
Preparation
• How hot should the water be to proof the yeast?
The water should ideally be between 105F / 40.5C – 115F / 46C.
• Can I prepare the bagel dough in my bread maker or KitchenAid / stand mixer?
You can absolutely use either. For a stand mixer: use the hook attachment, and knead the dough on the lowest setting. Do this for 5 to 6 minutes until smooth and springy. If you’re making a double batch, you might not be able to use your stand mixer for kneading– refer to the manufacturer’s instructions.
• My bagels aren’t smooth. What did I do wrong?
There’s two factors that come into play here: the way the dough is handled and the water the dough is boiled in. Being gentle is crucial to the formation of smooth looking bagels. The less you handle it, the smoother it will be. If you squeeze the dough roughly, it’ll turn out wrinkly. Like many folks, I bake these bagels a lot, and some batches come out smooth and gorgeous, and on bad days some come out wrinkly. It’s all about how you handle the dough, but in the end- it always tastes amazing!
When it comes to boiling, make sure the water is not at a rolling boil; this will also prevent them from looking rough.
• How can I achiece an even shinier, sweeter bagel? Can I use barley malt or honey?
Yes! This will achieve a slightly sweeter and shinier product. Use about 1 teaspoon of barley malt in the dough and a generous tablespoon in the pot of boiling water. Because this is not easily found, I have not made it a required ingredient for the recipe. However, it does add a delicious taste. Alternatively, you can use a couple tablespoons of brown sugar and/ or honey in the boiling water to achieve a similar effect.
• Do the bagels need an eggwash before they go into the oven?
No, an egg wash is not necessary, though it does give a beautiful sheen to the bagels. The bagels will be just as beautiful and delicious if you forego the egg wash– this is especially a great option for vegans.
Once boiled, add toppings to the wet, unbaked bagels immediately so that the toppings stick.
• My bagels stuck to my pan. What can I do to prevent this in the future?
The original recipe calls for simply using an oiled pan (I’ve edited it). Like many folks, I am paranoid about things sticking to pans, so I use parchment paper or a silpat baking mat (as shown in this post). Feel free to do the same. I do oil the parchment just a bit to add a little bit of extra non-stick protection, but it’s not necessary.
• I live at high elevation, what can I do to ensure these come out properly?
I’ve been told by bakers who live at a higher elevation that this recipe works well as is, however I know that high-altitude baking, especially with yeast, can be a headache as dough tends to rise about 25 to 50 percent quicker than at lower altitudes, so do keep that in mind.
A sure-fire way to ensure that the finished product is not very dense would be to reduce the amount of yeast to 1 teaspoon and allow the dough to rise for the recommended time in the recipe. If the dough has doubled in size after 1-hour, it’s good to start working with. If not, continue to let it rise, checking on it every 15 minutes until doubled in size. Your altitude, brand of flour, humidity, and room temperature are factors that would make the rising times vary.
• Can I make the bagels bigger?
You can, just keep in mind that they will need longer to bake, so check on them every few minutes past the 20 minute mark until they are uniformly golden brown.
Make Ahead and Storage
• How can I make the dough ahead of time? Can I refrigerate the dough over night?
The best means of making the dough ahead of time would be to prepare it, cover its container with plastic wrap, and rest it over night in the refrigerator. This is called a cold-rise. I often do this and I love this method because it allows the dough to achieve a more complex flavor. If you are doing a cold rise, be sure to allow the dough about 1/2 hour to come to room temperature before working with it.
• Can I par-bake the bagels for later baking?
Yes, you can bake them until they are a faint gold tinge (about 10-15 minutes). Cool the par-baked bagels completely before storing them in a resealable bag to be stored in the freezer. To be bake from frozen, bake the bagels for an additional 10-15 minutes, until soft and golden brown.
• Can I freeze the bagels? Do they keep well?
Once cool, out of the oven, you can freeze the bagels without any issues. Slice them and then freeze them in a freezer-safe plastic bag, and let them thaw when needed. If you’re planning on toasting them, thawing them is unnecessary.
• How long do the bagels stay fresh for?
The bagels will keep in a resealable plastic bag at room temperature for up to 2 days.
Updated May 14th, 2020 – As one of the most popular recipes here and in my book, I’ve received many questions about this bagel recipe. For your convenience, I’ve updated the post with photos, more information, and answers to your Frequently Asked Questions.
Have another question? Leave a comment below!
1,483 Comments
Alejandro
September 27, 2012 at 6:41 pmHello,
I want to know if if you have the recipe with fresh yeast insted of dry yeast. Since the reaction is diferent, its not the same amount. Also I want to know if the sugar whould be less, since its normaly used along with dry yeast to help activate it.
Thanks for your help and greeting from Bogota, Colombia
Alejandro
Sam
October 1, 2012 at 7:15 amIve used this recipe a couple of times now, the best bagels ever! I feel like a pro even though this recipe is so straight forward! Thanks for sharing this master piece :)
Mimshimaro
October 1, 2012 at 2:53 pmThe absolute recipe!!!
Sylvie
October 1, 2012 at 4:01 pmThe BEST bagels ever and bonus they are so easy to make!! Thank you for sharing this amazing recipe!
Karla
October 6, 2012 at 6:07 pmJust made these today…thanks for the wonderful recipe! We have recently moved south of the Mason-Dixon line from NY and miss good bagels. With a little tweaking, I am sure these will be a great substitute…thanks again!
Joy
October 7, 2012 at 4:47 pmThank you for the recipe. I made them today and the came out delicious.
Michele
October 8, 2012 at 12:45 amHaving basically resolving to simply stop eating bagels at all from being disappointed by store-bought soo darn often I went on a mission today to finally just make my own. These came out amazing!!
I made two batches, topped some with garlic and onion and some with sea salt, both were outstanding. Complimented these with the homemade veggie flavored cream cheese that I’ve been making for years and… Mmmm. Heaven!
(cream cheese btw is super easy… Add 2-3tbls each of tiny diced onion, celery and carrots or whatever else you like to 1pkg room temp cream cheese. It won’t knock your socks off right away but after setting in the fridge overnight, prepare to be mmmm-azed!)
Aaron
October 11, 2012 at 1:36 amCan’t stop eating these…wow!
Barry
October 16, 2012 at 6:45 amHI, In english cook books there is a dearth of bagel recipies. so, a big thankyou. I am about to lose my bagel baking virginity so here goes
michael
October 17, 2012 at 6:46 pmHi,
I am actually a rocket scientist (well, astrophysics, that’s near enough) and always make my own bread too – I still have doughy hands from having just made some! Never tried making bagels. I live in an agricultural area of the UK and there aren’t any bagel shops at all, so I’ll be using your recipe and seeing what I get. Mazel tov!
flyingpig666
November 1, 2012 at 6:39 amWow, this is a wonderful recipe–a gift that keeps on giving to all of us bagel-deprived persons around the world. To underline many of the comments above, this is the best recipe I have found that comes closest to the real deal. The tip about leaving the bagels to boil a bit longer to produce a chewier bagel is greatly appreciated. Merci beaucoup from France.
Louisa
November 16, 2012 at 1:08 amHi Kamran, greetings from Costa Rica! I have to thank you for this recipe, I love bagels, but the fact is that here we have bagels store, but they aren’t good enough, so I’ve been searching for some recipes, and actually this became in my favorite! Pretty easy to make, and delicious too! So, thank you again, for real, your recipe is now one of my favorites!
diane
November 17, 2012 at 6:17 pmI made these bagels are very good but I couldn’t get them brown very good on top. The bottom browned and was quite crusty think it was because of the oil from the pan. What do I need to do?
Sawyer
November 22, 2012 at 5:19 amThis is my first time making bagels and I decided to use your recipe, they turned out absolutely perfect, thanks so much for the recipe!
Gazzi
November 28, 2012 at 7:49 amThank you so much!!! Turned out PERFECT, bless ya:)
Cherrel
December 8, 2012 at 5:22 pmIt’s my first time making bagels with your recipe and it turned out very good. Thanks!
Anne Keller
December 9, 2012 at 12:10 amI just cannot wait to make this recipe.
Reading through all your comments I am so totally impressed with the positive mass reaction.
Nice to know that around the world we are all sharing this fabulous recipe.
Thank you.
Anne – Tasmania, Australia
Pat
December 14, 2012 at 1:18 pmI love fresh cinnamon sugar bagels…you know the ones with the cin sugar crust? Does anyone know how to achieve the crust?
teresa
December 19, 2012 at 7:34 amWe can’t wait to make these! Any suggestions about how to get toppings to stick without the egg wash? One of my daughters and I are allergic to eggs. Thanks!
Rose
December 19, 2012 at 5:55 pmThese are ammmmazing. I’m a East Coaster living in Iowa for vet school and I crave the comforts of a good bagel. THANK YOU!
For a blueberry twist add 3/4cup dried blueberries… even better.
Chinelo
December 20, 2012 at 4:18 pmAwesome recipe. I have found it better to let the dough rise for 10-15 minutes so that the bagels retain their shape after they are shaped into balls. But if you insist on waiting the hour out (which hardly anyone would prefer) you should make the bagels a lot smaller. For instance, if you were going to follow this recipe and let the dough rise for an hour make 11-12 bagels instead of 8.
Padma
December 30, 2012 at 3:49 amMy roommate and I were missing bagels as we are abroad, this was such a nice treat!
Mara
December 31, 2012 at 1:05 pmHi!
Great recipe! I just finished my first batch and can’t wait to try them. In the meantime, one issue that I had is that they flattened out a lot during the boiling process. Before they went in the water, they were perfect size, smooth. After the boiling, they were very lumpy and much more flat (never puffed back up after baking). Any ideas what might have went wrong?
Kamran
December 31, 2012 at 10:53 pmHi Mara- It seems like you didn’t let your bagel dough rise long enough… Once they were in the water, did they float to the top at all, or did they stay at the bottom of the pot?
Erin
January 1, 2013 at 9:43 pmFirstly, Happy New Year!!! :)
I’m super excited to try these out as you can’t get good bagels where I live. However, I can only get my hands on “instant yeast”- is this the same as active dry yeast? If not, do you know how to convert between them? Thanks!
Mairi
January 2, 2013 at 8:26 amWoohoo! I just made bagels via your recipe – I was a little worried how they would turn out as I only had plain flour, and it is a super hot and humid night here in Brisbane, Australia… While they aren’t as pretty as yours, they taste fantastic! I am channelling NYC sitting here with a Starbucks Christmas Blend ready-brew and a warm bagel with cream cheese! Thanks so much for the recipe – I love it!
Nacho
January 2, 2013 at 7:22 pmHappy new Year !
I am making bagels and I just wanted to thank you for your generosity
My best wishes from Tapalpa México
pamela
January 4, 2013 at 6:35 pmis there a recipe for using white wheat flour for these bagels
Kamran
January 4, 2013 at 8:25 pmHi Pamela- You can simply substitute it for the bread flour entirely, or you can do half white whole wheat flour and half all-purpose flour. The recipe is pretty flexible!
Mara
January 5, 2013 at 6:17 pmHi Kamran!
Yes, they floated to the top immediately (never really submerged). I was actually thinking it could be the opposite (that they proofed too long?) I let the dough rise about half an hour longer than the recipe said…
lyda
January 5, 2013 at 6:45 pmReally good bagels..never made bagels before..I bake bread often..can’t wait to get up in the morning and have another!!!!!!! Thanks so much!!!!!
Lisa
January 5, 2013 at 11:10 pmCan I use instant rise yeast instead of active dry yeast? And if so should I skip the first step of proofing the yeast in water or should I still do that step?
Sharicka
January 6, 2013 at 9:06 amHappy New Year!!
First of all this is the second time i am making these and they are amazing!! and might i say even better than i have ever tasted. The supermarket one’s are HORRIBLE!!! The first time i made them i didn’t have any doubt in my mind they wouldn’t come out right and they did!! Therefore your recipe will be murderlize (i know that isn’t a wrd ;D) throughout the year from me. Thank you for this recipe.
Best wishes from Kingston, Jamaica.
Gigi
January 10, 2013 at 11:31 pmMy friend and I made these and they are so amazing I wish we’d doubled the recipe! My family was fighting for them. We have plenty of bagel places but we wanted to make them for fun and they turned out great, they are fool proof. The only change we made was adding a cup of honey to the water when boiling, not sure if it made a huge difference because this was the first and only time I’ve made bagels, but a different recipe said it made them chewier. We also made sixteen mini bagels instead of 8 big ones. Thanks so much for the recipe and instructions!
Becca
January 12, 2013 at 2:02 amHoly moly! These are fantastic! I made a double batch: cinnamon and sugar, poppyseed and chive, Parmesan and plain. These bagels are worth every moment they take to make! Bagel devil is more like it… I’ve eaten 5 or 6 in the past 6 hours or so…. I might go through a bagel binge over the next, well forever- just saying. :D
Silvana
January 14, 2013 at 6:27 amThank you! I Live in Kathmandu And we were missing to have a bagel at breakfast. This recipe is fantastic!
Jeremy Kelly
January 19, 2013 at 3:12 pmIn the process of baking them now and cant wait! I doubled the recipe and did blueberries in half. First batch is about to come out as we..uh?…type. Wait for it…….WOW!!! not as dense as I am use to, but way tastier then I was anticipating! I will certainly be switching out my bagel recipe! Thanks for sharing!
Pooja
January 21, 2013 at 12:17 amCan I substitute egg replacer instead of eggs for egg wash because I am a vegetarian and also can I make the dough in the bread machine?
Elizabeth Smith
January 21, 2013 at 5:37 amWell, I have to give it to you, these are by far the best bagels I’ve had in a long time and my “bagel-loving” friends agree with me! I live in Spain and it is not easy to come by fresh bagels here unless you make them yourself. I made 3 batches this weekend and received nothing but praise, so THANKS A MILLION FOR SHARING!
Elizabeth Smith
January 21, 2013 at 5:58 amTwo questions I have that I forgot to ask in my previous comment. Is this the kind of dough that can be made ahead and baked the following day? In other words, can you make a batch of dough, refrigerate it and then do the rising, proofing, boiling, etc. the following day? Also, if you make a good number of these bagels to keep, I assume they should be frozen right away. Is this correct? Again, thanks a bunch for sharing this and your tips.
Kasey
January 21, 2013 at 10:36 amThese are scrumptious! I was very nervous to make these for the first time but they turned out great. I was wondering though if this recipe can easily be doubled?
Ronnie
January 23, 2013 at 3:08 amIn NZ, you cannot get a proper bagel. I’m a fourteen year old American living in NZ who loves to bake. After seeing a gorgeous bagel sandwich in a small town cafe, I couldn’t stop craving them. I found your recipe and decided to try it. I followed the recipe except with a slight modification – I used about 1 1/3 cups of oat flour and used a mix of all purpose and high grade flour for the rest. They came out heveanly!
Next time I think put the dough in the fridge overnight and put an egg wash on it even without the seeds – also I’ll experiment with different amounts of Oat flour.
Thank you so much for this recipe!
Jeremy
January 24, 2013 at 7:47 amMy attempt didn’t turn out that well. Rolling them into balls was tough and there were always bits that wouldn’t merge with the rest of the ball. They didn’t sink when placed in water. The resulting bagel was rather dry with a dry weak crust. I’m guessing my problem is the amount of flour and water needed to get the ambiguous rating of a “moist and firm” or “firm and stiff” dough.
Any tips?
Dave
January 24, 2013 at 6:06 pmWow..since retiring and moving to North Carolina, I have not been able to find a decent NY style bagel. After checking all the recipes and did not want to wait for the “sponge” method, _I decided to try your recipe. Since I retired,I have been baking more homemade goods so when I got the craving for bagels I decided to give it a try. They came out perfect. The only tweek I did was add some honey to the boiling water to give them a subtle sweetness. They are great and I don’t have to look any further. I was going to try freezing some but they aren’t going to make it that far! Thanks!!
Louise
January 30, 2013 at 7:26 amThese are amazing! Thank you so much! I made them into cinnamon and raisin (sp?) by adding 1.5 tbsp of cinnamon with the flour, and 3 tbsp of washed raisins at the punching down stage. I didn’t want to add the raisins too early as I was worried the sugars and natural yeasts may effect the rise.
I also used my kenwood to knead with the dough hook, let it go for about 8 minutes, I may let it go for a bit longer next time.
They are superb, I split and froze them after eating one warm from the oven, and the frozen ones are still excellent toasted. I will never buy a bagel from the supermarket again!
Siri
January 30, 2013 at 12:38 pmJust made these bagels, waiting for them to come out of the oven! I brushed them with an egg wash and then coated them with a mix of cinnamon and sugar! YUM!
Aggy
February 9, 2013 at 6:29 amI was browsing the net for a great bagel recipe when l came across this one. Reading through the comments l knew had found a great one. As an expat from England living in Senegal found it a bit of a challenge getting white bread flour, so l called around to friends and l got 1kg of un bleached white flour. Gosh l enjoyed them so much, at the moment am making the second batch. Have never had a bagel as good as these ones thank you so much for the recipe.
Kathy
February 9, 2013 at 1:12 pmThank you so much for this recipe! I have looked at a zillion on the net. This one is so easy and good. I made two batches today. One regular, one garlic and onion. I sauteed half cup minced onion and 2 cloves garlic, and added it to the larger portion of water when it was added. They came out great! I am having fun experimenting. Thank you!!!
Teresa
February 10, 2013 at 1:46 amThank you so much for this recipe – Ive had mixed success in the past trying to make bagels but these turned out fantastically well – havent seen anything like them here in Sydney and they were a bit hit with my friends at brunch today!
Elise
February 10, 2013 at 12:25 pmThank you, thank you, thank you!!! This was a great recipe. Today was the first time (of many future times) that I made these bagels, and despite being not as smooth and beautiful as yours, they tasted great! I’m an American living in Berlin, and although the Germans boast about their good bread, there is nothing like a bagel. Needless to say, I’m very grateful for this easy tasty recipe! My boyfriend is Spanish and he had never eaten a bagel before, but I made him these and he loved it! Thanks again for your great recipe!!! (Also, I have to say your website is very well done! Great job on the writing style, photography, and recipes!) By the way, how do you get your bagel balls so smooth (step 6)? I’m thinking maybe my dough was too dry and that is why they didn’t smooth over so well?
Susie
February 11, 2013 at 4:28 pmWOW! These were so easy and so tasty! I am an American living in Eastern Europe where we have rye bread coming out of our ears, but nary a bagel to be found. One of the other expat women and I made your recipe this weekend and are THRILLED to have a taste of home that we can easily whip up on a Saturday afternoon. Thanks for sharing.
Annie
February 11, 2013 at 4:32 pmI actually wanted to start my post with the exact same words as Elise just yesterday: Thank you, thank you, thank you! I am from Switzerland, but L-O-V-E Bagels.. just where to get them in the country of chocolate and cheese..? Easy, make them yourself.. with your recipe! They turned out perfect and were gone within minutes (8 Bagels, 3 people.. it really only took about a quarter of an hour!)
I’ll be making some more tomorrow .. and the day after that.. and after that :)