
When I originally sat down to write this Yellow Birthday Cake recipe, I was not going to make a big deal that The Sophisticated Gourmet has turned 2 on this very day, but after speaking with friends and realizing that I was being foolish for not making a big deal about it, I had to scrap my old post and hold off on pressing the “Publish” button. Dear readers friends- TSG is 2-years-old today! Can you believe it?!
Before I get to this yellow birthday cake, I want to reminisce… It was just two years ago when I sat down, wrote a few paragraphs, and posted a few recipes on TSG’s old home at Blogger.com. I didn’t expect the posts to be read, but after making an account with an online food community, FoodBuzz, my life changed that very week. I friended random strangers on the web. The first person I spoke with was my friend, Rachael from Tokyo Terrace. After literally 15 seconds of requesting her as a friend on FoodBuzz, she sent me a message welcoming me to the community; we briefly conversed. I can’t remember what the conversation was about, but I did think it was a little weird that some stranger was being so nice to me on the web. I also crossed my fingers that she was not some crazy old lady using a photo she found on Google Images. At the time, I had known the web to be a place of crazy people, pedophiles, teens constantly changing their MySpace and Facebook profile photos on an hourly basis, and parents making fake social networking accounts to “protect” their children.
But after a week of conversing with people in a community that immediately felt like home, my views on the internet immediately changed. After friending Rachael, Alice, and several others, I soon learned that the food blogging community was full of kind, caring people who shared the same passions that I do. They understand me, inspire me, and continue to encourage me to share and be a part of a community that felt (and continues to feel!) like home to me.
I soon learned that if I wanted to run a food blog (and how to make exquisite yellow birthday cakes), there simply had to be photos. The thought of taking photos for each of my post sounded like pure hell. Before that very day, I hadn’t picked up a camera and expected to come out with decent photos. I always expected cut-off faces, close-ups of peoples’ nostrils, and red-eyes. My first camera was the iSight on my MacBook, the same one that I am currently writing this post on. Holding a MacBook upside-down and contorting my body to see if the photo would be decent, was quite an experience (yeah….). The photos were horrible- the graininess and poor lighting made my photos look as if I was taking pictures on a surveillance camera. Horrible photos or not, dear friends and readers poured in and encouraged me to continue to write and share recipes. After a couple months, my mother bought me a Canon point & shoot, and just last year, a dear friend whom I met through food blogging, Olga, gave me the dSLR camera that all of my photos are taken with. Since my iSight days, I think it’s safe to say that my photos have gotten much better!
After entering this community, I’ve made friends that I could have never met elsewhere. There’s Jaden, for example, who defended me against several angry bloggers when she let me choose a winner for a trip she was giving away to see the set of Julie & Julia. That night, she told me that having more people know you is both good and bad- that there will always be haters and there will be those who support you through-and-through. What she said is true. I get all sorts of emails and comments. I get hate emails- some of which do ruin my day, but the emails, comments, etc. from single parents, fathers just learning how to cook, friends, and new readers who have tried recipes and loved them- make my days brighter and leave a smile on my face. Every time I get a kind email or comment about a recipe that I’ve shared; I am honored that someone cooked or baked something from this site and shared it with the people they love.
Because of this community, I’ve been honored to have met so many kind people in person: Alejandra, Alice, Amy, Anna, Ashley, Britt, Cheryl, Chris & Karen, David, Deb, Eliana, Elise, Erika, Gail, Jaden, Jennie P., Jennifer D., Jennifer L., Kristen, Lauren, Maggy, Nancy, Niri, Olga, Pim, Ree, Sara Kate, Shauna & Danny (and Lu!), Stephanie, Tami, Tonya, and soo many more.
I have yet to meet my partners in crime (Elissa, Hannah, Lauren, and Tessa) in person, but we will next month when we speak on our panel at BlogHer Food in Georgia. I am excited to meet my online best-friends and to create more friendships in the near future.
Most of all- I am honored to have such supportive readers and online friends.
Thank you all for the support, encouragement, and for allowing The Sophisticated Gourmet into your homes. It’s been a great two years- here’s to many more!
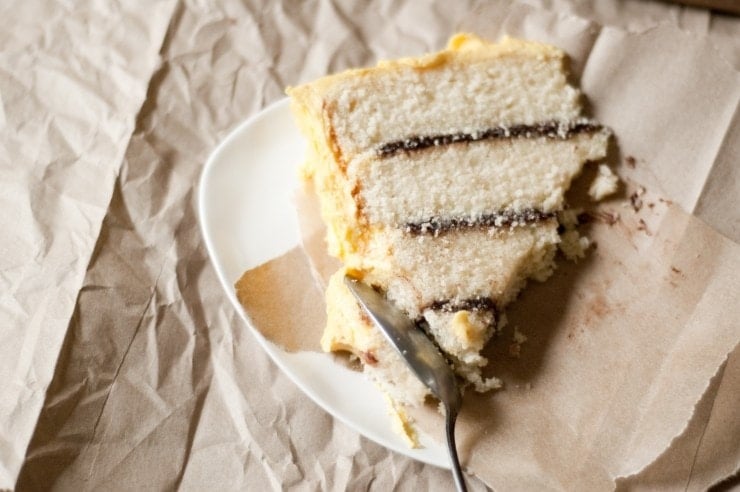
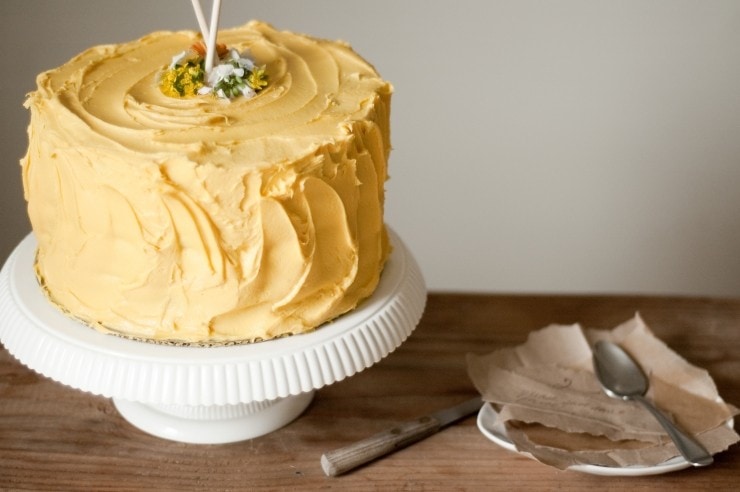
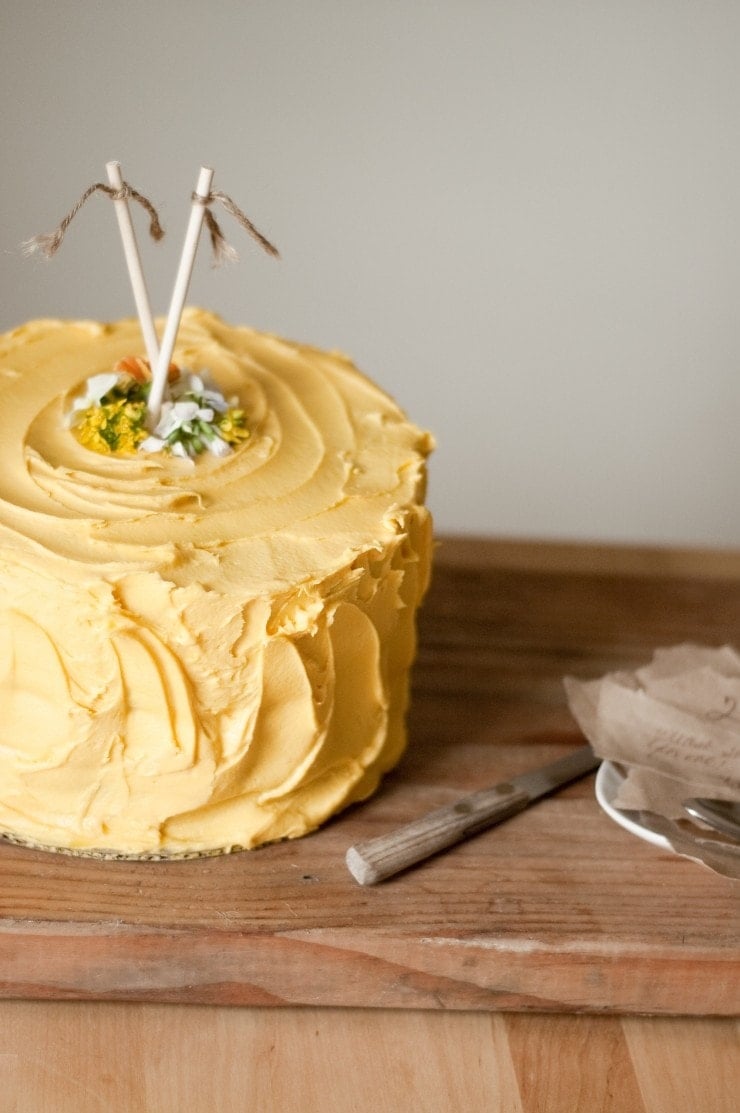
Now, let’s get to the yellow birthday cake recipe! This birthday cake is made for people who love traditional things. It’s a classic birthday cake. Sort of. This Yellow Birthday Cake has three thin layers of rich dark chocolate frosting sandwiched between four layers of yellow butter cake, which is then covered in a yellow, vanilla buttercream frosting. I promise that there’s absolutely no butter in this. And the sugar? Pshh! Who needs that in a cake, right?
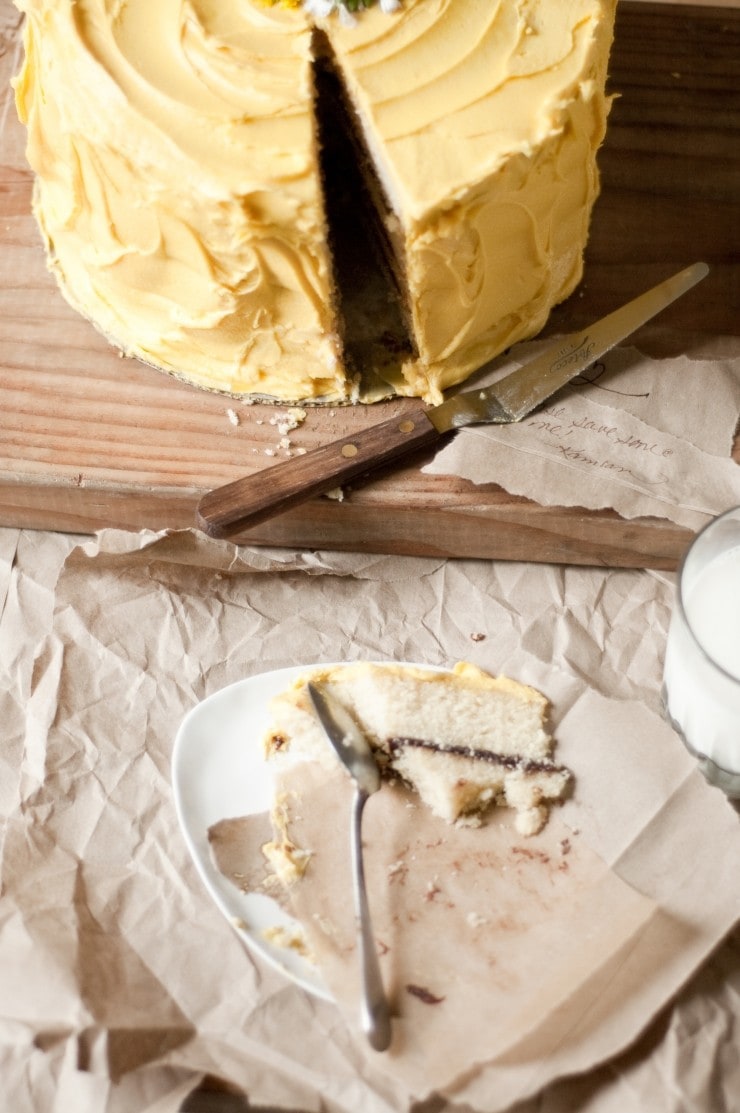
Okay, I am joking a little, but TWO YEARS is something to celebrate and what better to celebrate a birthday than with lots of butter, sugar, and chocolate? If you answered “A salad” we might not be able to be friends anymore. I know, I know, you’re trying to get ready for bathing suit season and I’m not helping. Hey, will you really say “no thanks!” to cake? I didn’t think so.
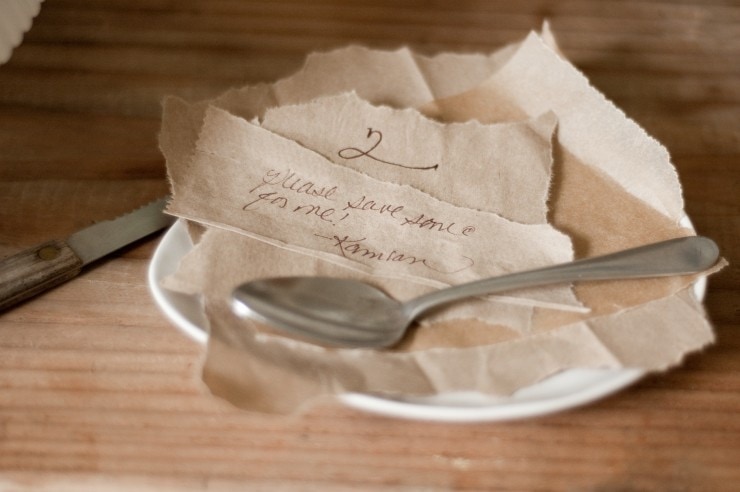
So, let’s celebrate- let’s have some cake. I’ll wash the dishes for you. It’s the least that I can do.
Yellow Birthday Cake Recipe

Cake Adapted from Martha Stewart & Rose Levy Beranbaum
Chocolate Frosting adapted from Nigella Lawson
When I decided that making a yellow butter cake would be a good idea, I had the intentions of making a two-layer cake. After I had taken the two layers out of the oven, and cooled them, I decided that four layers was extremely necessary for my well-being. I have provided the halved recipe for you, but if your well-being depends on a huge four-layer cake, as mine did, you will need to make the cake part of the recipe twice; a double recipe won’t turn out the same… My KitchenAid could barely fit the batter for the two-layer recipe; trying to fit enough batter for four layers would be quite an interesting sight. Making both recipes separately does mean washing your mixing bowl and beater blade twice (make the second batch of cake batter once the other cakes are out of the oven, so they can go from bowl- to pans- to ovens right away).
The yellow birthday cake recipe was adapted from a Martha Stewart Yellow Butter Cake recipe, but I simply had to make it easier by adapting it to use Rose Levy Berenbaum’s infamous cake mixing technique.
The Chocolate frosting was adapted from a Nigella Lawson recipe. The frosting never sets hard, which makes it perfect for the cake filling, and it is very rich and flavorful, which means that slicing your cake on the thinner side won’t hurt. Although the chocolate frosting is rich and flavorful, it does not compete with the flavor of the yellow butter cake and the vanilla frosting that covers the cake; all of the flavors go beautifully together, which brings instant smiles to peoples’ faces. Another thing to note with the chocolate frosting: it will be very liquidy at first, but it will set up after an hour or two, so making it while the cakes are in the oven is a good idea.
If you do decide to go with making a four layer cake (it’s extra work, but the end result is very much worth it!), keep in mind that you can simply double the frosting recipes without any issues.
Ingredients
For the Chocolate Frosting:
- 2 tablespoons / 30 ml water
- 1 ½ teaspoons / 8 g dark muscovado sugar (can use dark brown sugar)
- 3 tablespoons / 42 g unsalted butter, cubed
- 2.5 oz / 75 g Good-Quality dark chocolate (I used a 70% Callebaut), finely chopped
For the Cake Layers:
- 1 ½ cups / 180 g All-Purpose Flour
- 1 ½ cups / 144 g Cake Flour
- 1 tablespoon baking powder
- ½ teaspoon fine-grain sea salt
- 1 ¾ cups / 355 g granulated sugar
- 2 sticks / 1 cup / 225g unsalted butter slightly soft, but still hard; cut into 1-inch cubes
- 4 large eggs, room temperature
- 1 tablespoon pure vanilla extract
- 1 ¼ cups / 295 ml whole milk, room temperature
For the Vanilla Buttercream:
- 1 ¼ sticks butter / 141 g unsalted butter, room temperature
- 4 cups / 460g confectioner’s sugar
- 4 tablespoons / 60 ml milk
- 1 tablespoon vanilla extract
- Food coloring of your choice (I use this natural food coloring)
Instructions
Make the Chocolate Frosting:
- Put the water, dark muscovado sugar, and butter in a pan over a low heat until melted. Once the mixture begins to bubble, take the pan off the heat and add in the chopped chocolate. Swirl the pan to that all of the chocolate is hit with the heat and begins to melt. Allow it to stand for a minute, then once everything is melted, whisk the mixture until it is smooth and glossy.
- The mixture will be runny. Set it aside, and whisk every now and again, the mixture will thicken significantly.
Make the Cakes:
- Preheat oven to 350ºF. Butter two 8-by-2-inch round cake pans (can use 9-by-2-inch); line the bottoms with parchment paper. Butter the parchment, and dust the pans with flour, being sure to tap out the excess. Set aside.
- In the bowl of an electric mixer fitted with a paddle attachment, combine flours, sugar, baking powder, and salt; mix on low speed until combined (about 15 seconds). Add the butter pieces, mixing until just coated with flour (the mixture will be pebbly).
- In a large bowl or measuring cup, whisk together the eggs, milk, and vanilla. With the mixer on medium speed, add the wet ingredients in three parts, being sure to scrape down the sides of the bowl before each addition. Beat the mixture until the ingredients are incorporated, but be sure not to over-beat.
- Divide the batter between the prepared cake pans and smooth the batter out with an offset spatula. Bake, rotating halfway through, until the cakes are golden brown, are pulling away from the sides, and a cake tester inserted into the center of each cake comes out clean, about 25-35 minutes.
- Once the cakes are out of the oven, with a [dry] clean oven mitt (preferably a cloth one), gently press down onto the cakes, to make them level (this will allow you to skip a whole step in trimming the cakes).
- Transfer the pans to wire racks to cook for 20 minutes. Invert the cakes onto the rack; peel off the parchment. Reinvert the cakes and let them cool completely, top sides up.
While the cakes are cooling, make the Vanilla Buttercream:
- In the bowl of an electric mixer fitted with a paddle attachment, beat all of the vanilla buttercream ingredients together, until well combined. Set aside until ready to decorate.
Decorate:
- Place one cake on a cake board (bottom side up) and spread the chocolate frosting, being sure not to spread it all the way to the edges. Leave at least a ½-inch space. Place the second cake on top of the first (bottom side-up).
- At this point, you can put the cake in the freezer for 10 minutes, which will make frosting the cake much easier. With the four layer cake, I regret not putting it in and I got a buckle under the frosting.
- Using an off-set spatula, spread a thin layer of frosting over the top and sides of the layer cake. Let the frosting set in the refrigerator for 20 to 30 minutes; then, spread a thick coat over the base coat.
Notes
If you are making a 4-layer cake, remember to double the frosting recipes and to spread ⅓ of the chocolate frosting in between each cake layer before frosting the outside of the cake with the vanilla buttercream
Nutrition Information:
Yield:
12 SlicesServing Size:
1Amount Per Serving: Calories: 692Total Fat: 32gSaturated Fat: 19gTrans Fat: 0gUnsaturated Fat: 11gCholesterol: 139mgSodium: 254mgCarbohydrates: 95gFiber: 1gSugar: 72gProtein: 6g
76 Comments
Allison
April 21, 2011 at 4:58 pmWhat a beautiful bright and sunny birthday cake! I love to hear your stories of your blog over the past two years, and all the friends you’ve made through this experience.
susan
April 22, 2011 at 1:45 pmthis is my kind of cake. absolutely gorgeous and I love the photos!
Millie
April 25, 2011 at 3:01 amCongratulations Kamran on your 2nd BloggieVersary. I’m not a food blogger, but a renovation blogger & your incredible Roast Herb Chicken has sustained us many times at the end of a long day of smashing bricks, stripping & sanding wood, painting over the Mission Brown etc. Your talent knows no end, so keep up the fabulous work.
Millie x
P.S. At 55 I think I may be one those crazy old ladies who very occasionally uses am image ‘borrowed’ from Google images. Forgive me.
Sara
April 25, 2011 at 1:32 pmCongratulations! I may be saying this rather self-servedly, but 2 years is a great milestone. And that looks like a great cake, incidentally.
Tracey
April 26, 2011 at 8:14 pmCongrats! I’m a fellow teen baker – and I absolutely love your site! That cake looks to die for. Keep up the great work – your photography is awesome.
Alejandra
May 6, 2011 at 2:17 pmThis comment is very late, but just wanted tell you how impressed I always am by your talent and love for the food and for our funny little blogging community. You’re a truly special person and it’s been great watching your blog grow over these past two years. Looking forward to hanging out at lots of future events and parties. xo
kamran
May 10, 2011 at 9:51 pmYou’re very kind, Alejandra! Thanks so much! :)
Eliana
May 13, 2011 at 9:28 amCongrats on hitting your two year mark Kamran! Sorry this comes a little late. I’be thoroughly enjoyed your beautiful and throughful blog posts and look forward to reading many many more of them.
Sweetapolita (Rosie)
May 15, 2011 at 7:49 amCongratulations on 2 years, Kamran! I love your words about your start in blogging and your experiences. If I was as motivated as you as a teen, it would have been a miraculous thing! You’re amazing and talented, and, oh yes, I love this cake! I love the rustic exterior, the color of the frosting, and the photos!
Sweetapolita (Rosie)
May 15, 2011 at 7:50 amPS. I just realized I used 4 exclamation marks in my comment, and completely excluded any other form of punctuation. ;)
Lora @cakeduchess
May 15, 2011 at 4:37 pmHi Kamran- Happy Blogiversary! I came here intrigued by this delicious cake and left feeling inspired. It’s true that the food blogging community is full of supportive people. I’ve “met” many I now happily call my friends:) I look forward to your next year of blogging and need to explore the rest of your delicious recipes!
Meagan Lodge
July 27, 2011 at 3:34 pmI just found your blog! Love <3 <3
Asai M
July 4, 2013 at 7:14 pmJust thought I’d let you know that you are the one food blog I know I can come to in order to find a delicious recipe. After making your chocolate-strawberry cake and being so pleased, your blog has become a reference point for me. Thanks for all you do and showing your passion so clearly in this blog!
Kit
March 17, 2019 at 9:35 pmWow the color of the cake looks so appealing! Id like to try this one too with chocolate cake inside as my kids love chocolate cakes. I hope I dont destroy the outer color icing with using chocolate as cake.
Bondita
November 8, 2019 at 1:23 amWow loved the recipe, Can I try this same to make cupcakes?
anil
May 20, 2020 at 8:58 amCongratulations Kamran. The food blogger community has pointed me to your blog and I’ve enjoyed it ever since. Nice recipe.